Printing a Shoebox Divider
We have piles of shoes in our entryway. We have kids who help the piles grow. We have a dog whose love language is taking shoes, nibbling them, leaving them in unexpected places, and returning for more until our living room contains two different flip flops, a sequined sneaker, a hiking boot, and one adult Croc (I’m guilty of piling too). We have a problem.
I’m a problem solver. I found some very nice, clear, stackable shoeboxes with drop fronts from The Container Store. I also found that they are $20 each and I don’t want to spend $250 on shoe storage (in fairness, they are less during sales). I found a cheaper version on Amazon and after 20 minutes of assembly I had them arranged in our closet. The boxes are large enough that they can accommodate two pairs of kids’ shoes or women’s flats, but it’s a little messy. I’ve been looking for opportunities to design and 3D print something custom and a divider for these shoeboxes seemed low stakes.
My plan was to design an I-beam to sit in the middle of the box, held in place with pressure from the top and bottom. First lesson: the parts of an I-beam are the flange (top and bottom) and the web (the tall part). It took me awhile to prototype the dimensions for the divider. The interior height of the box was hard to measure accurately. I ended up doing more test prints than I would have liked. I figured I would measure, print a sample, and adjust. Instead I printed five samples and made adjustments each time. By the end, I realized I could prototype more quickly with cardboard and used that to figure out the final height.
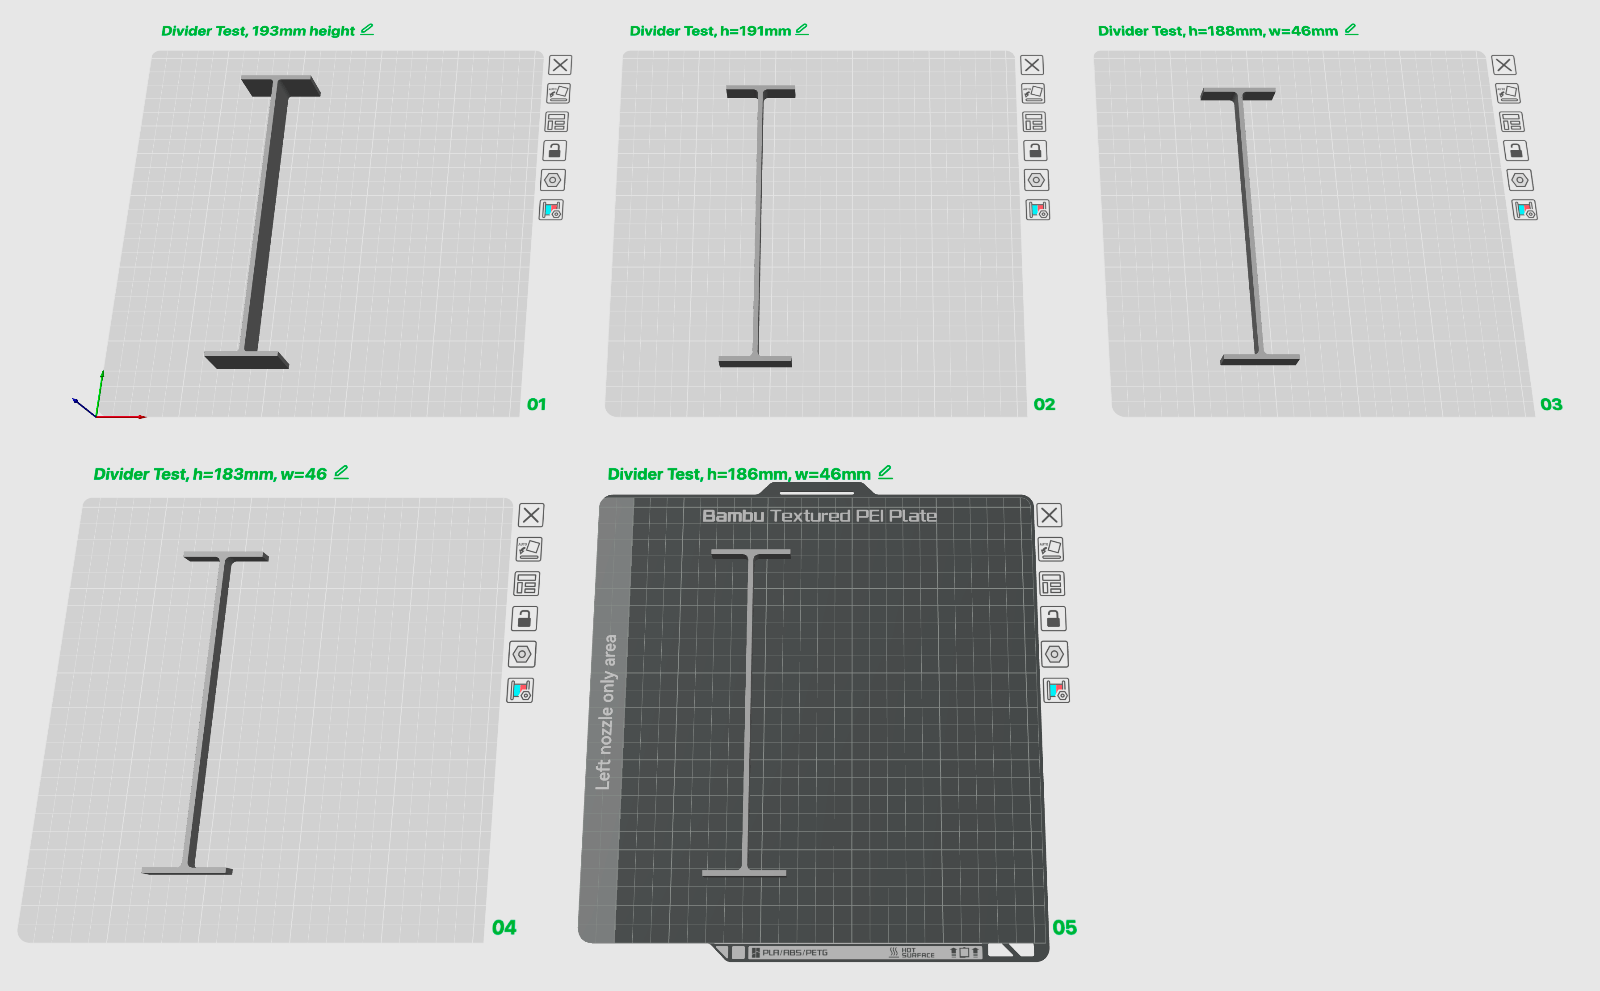
I-beam samples of various heights that I printed to check the measurements.
I used Autodesk Fusion to design this simple part. It’s a very complicated program! The target audience is clearly professionals who know what they’re doing and likely have some training in engineering. Neither of those is me. That’s not to say it’s impossible to use—there are tons of tutorials and videos online—just that I could not open the program and figure out what to do without assistance. Fusion costs $700–$2000 a year but there is a personal use version that is free.
Fusion is a parametric modeling program, which is different from other programs I’ve used like SketchUp. Everything you define in your model is a “parameter” which can be adjusted in the future. For example, an object has such-and-such width and height, extruded by another dimension, offset from another object by this amount, and so on. You can use variables for these values, you can do math like divider_width_mm + border_mm, etc.
To make my I-beam I drew a rectangle with my height and width and extruded the depth. Then I added the flanges, setting the width I wanted to fit into the shoebox. I read that I should add a fillet between the web and the flange. So I planned to do that, except first I needed to figure out what a fillet was.
It’s fun to learn new stuff (including—or maybe even especially?—a complicated program like Fusion). I had heard the term “chamfer” before but didn’t actually know what it was. I had not heard the term fillet, but it’s related and what I needed. A fillet is a rounded transition on an edge. Two pieces that join at a sharp, 90° angle can be fragile, so you add a fillet to strengthen the part. In Fusion, this is easy: you select an edge and select Modify → Fillet.
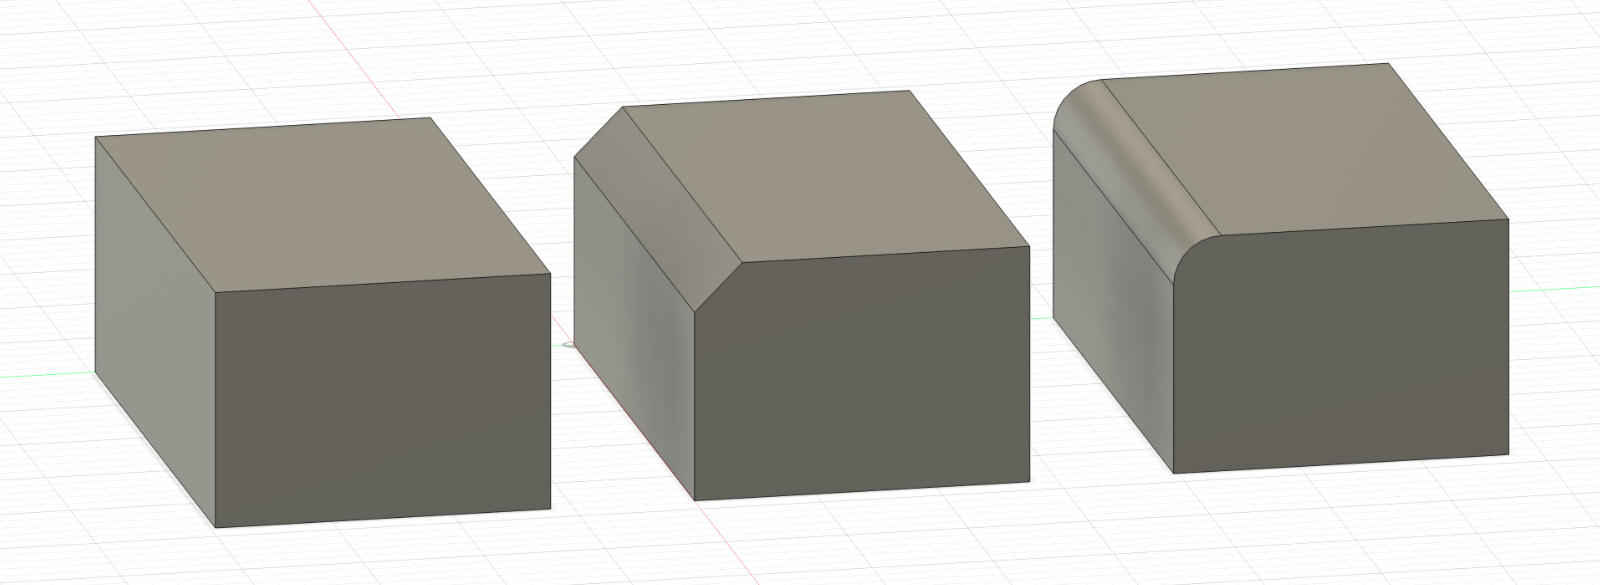
A rectangle with square edges (left), with a chamfer on one edge (middle), and with a fillet on one edge (right).
I decided to add a patterned perforation to the panel so that it looks nicer, uses less filament, and I learn how to do it. In Fusion, you do this by drawing your shape, constraining to a certain distance from the edge, and then turning it into a repeating pattern.
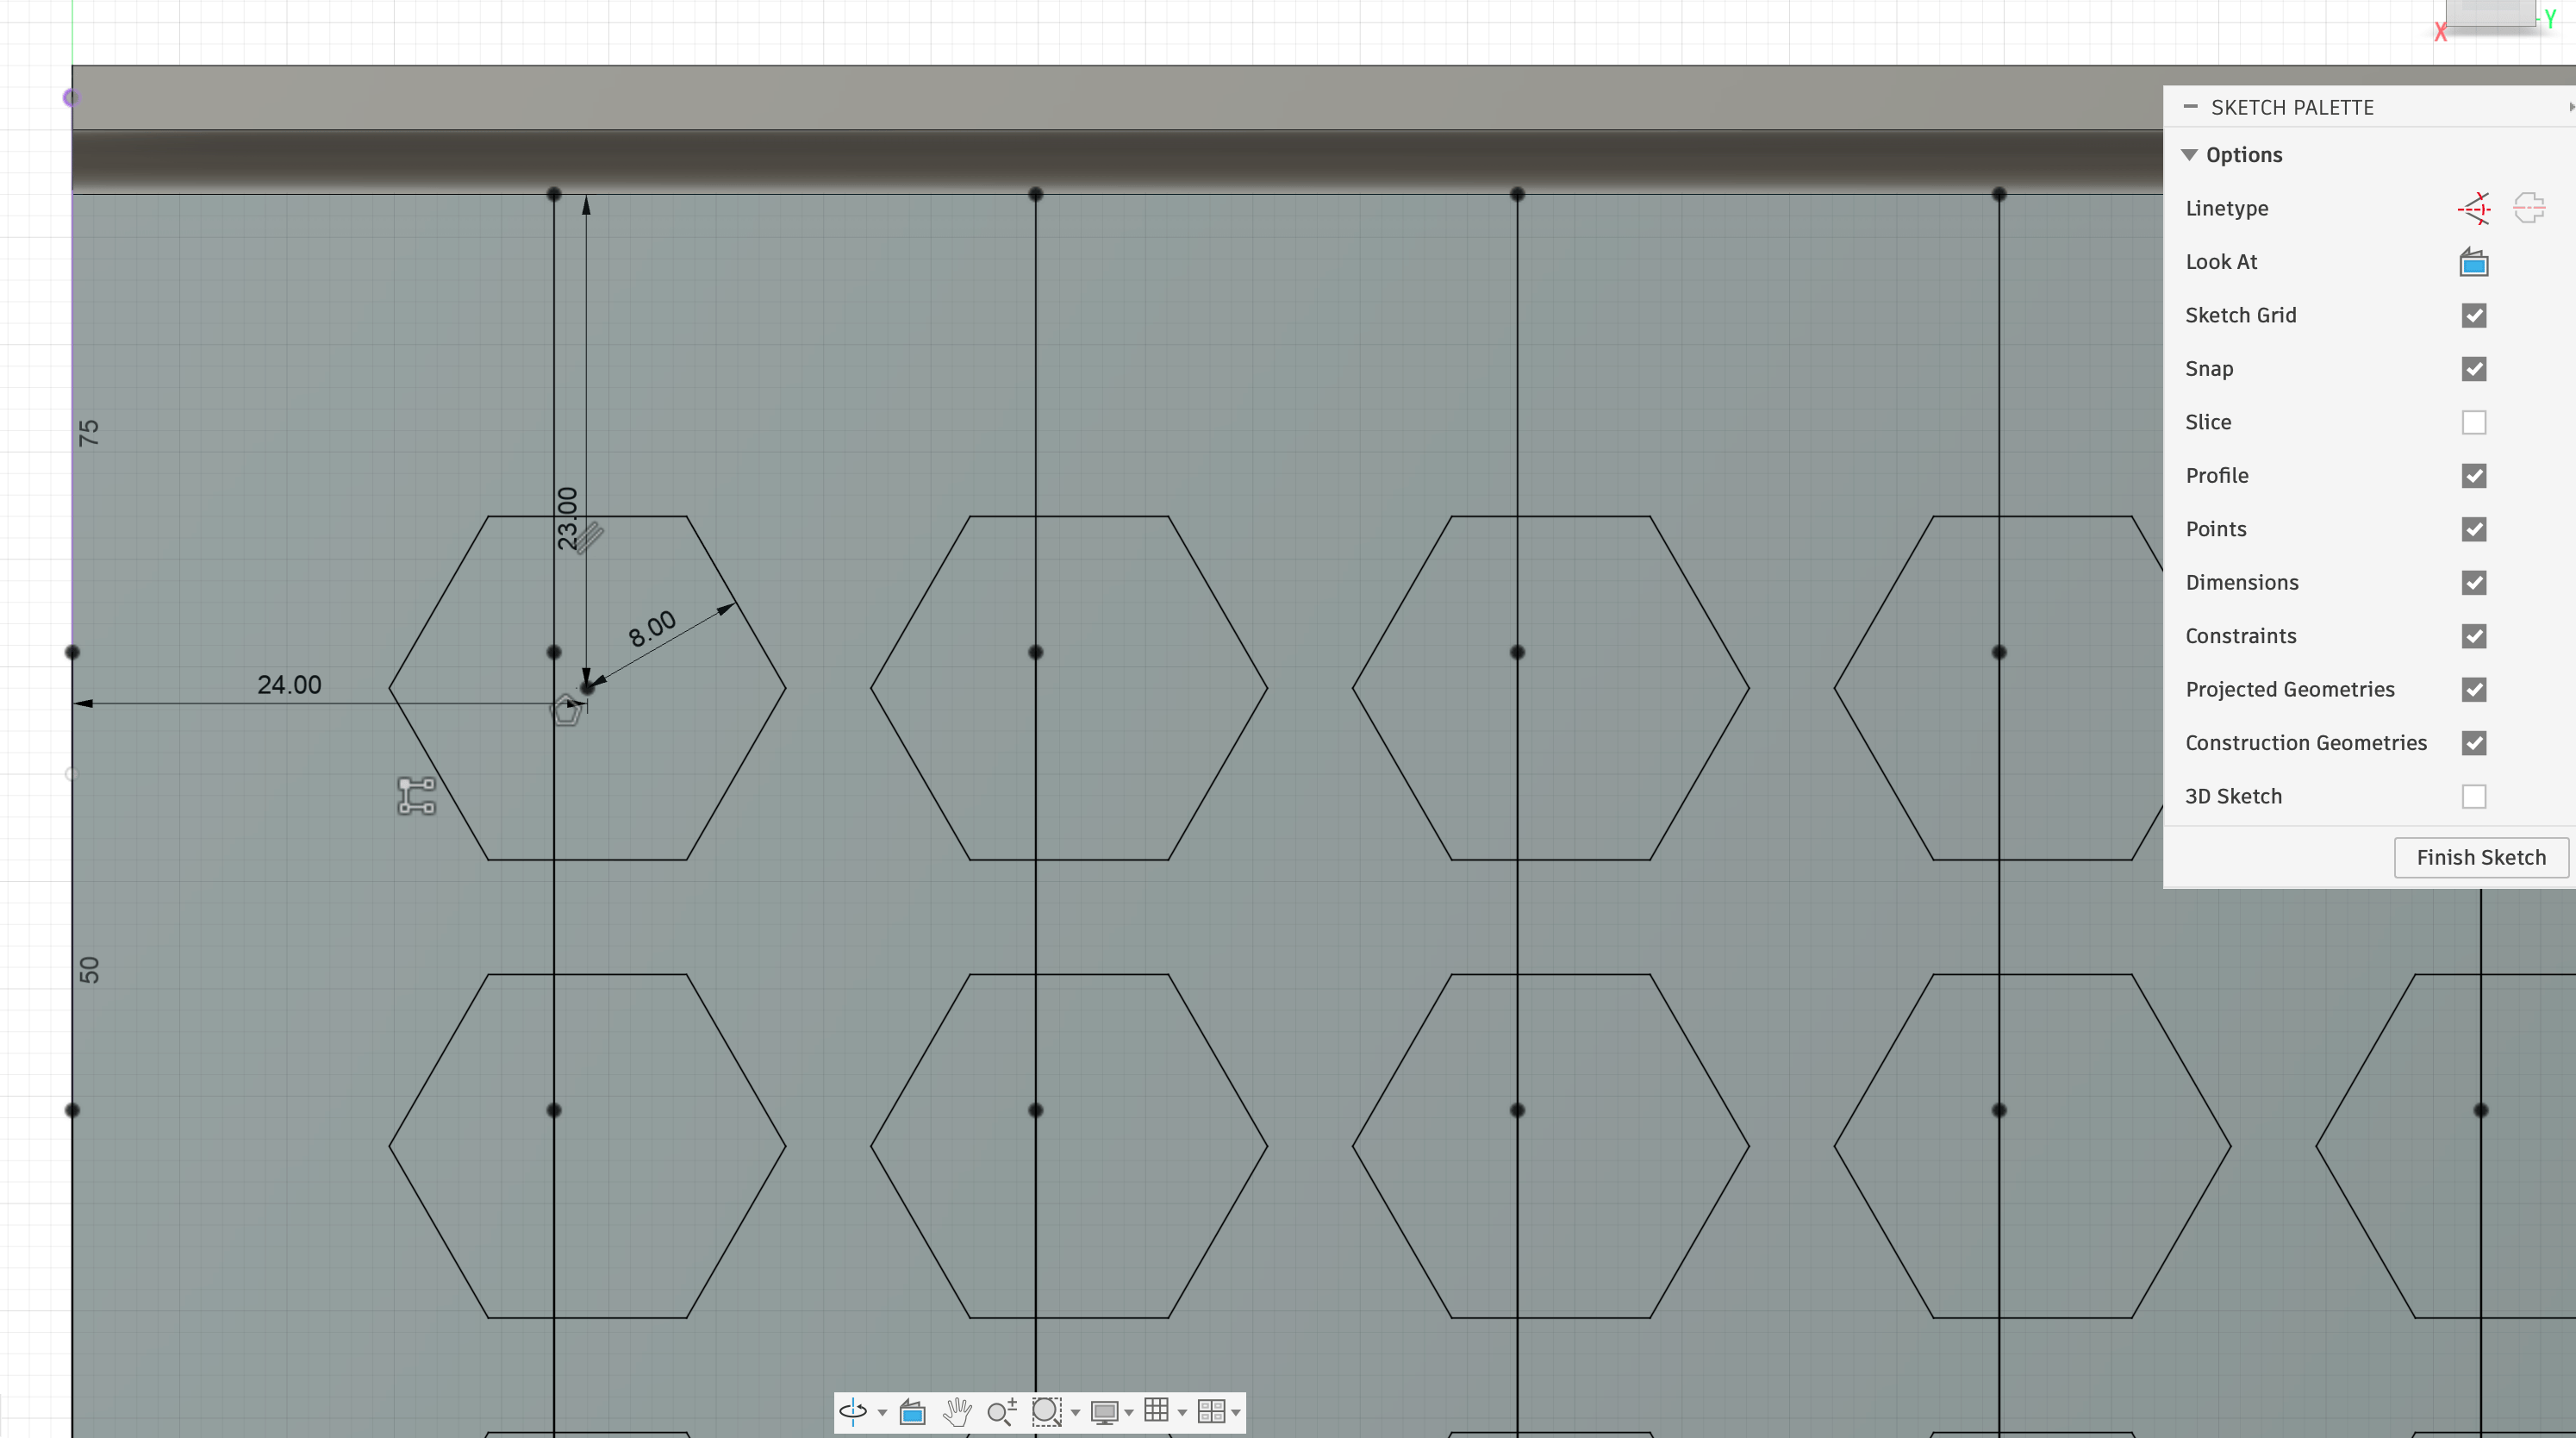
Creating hexagon cutouts on the web of the I-beam by specifying parameters.
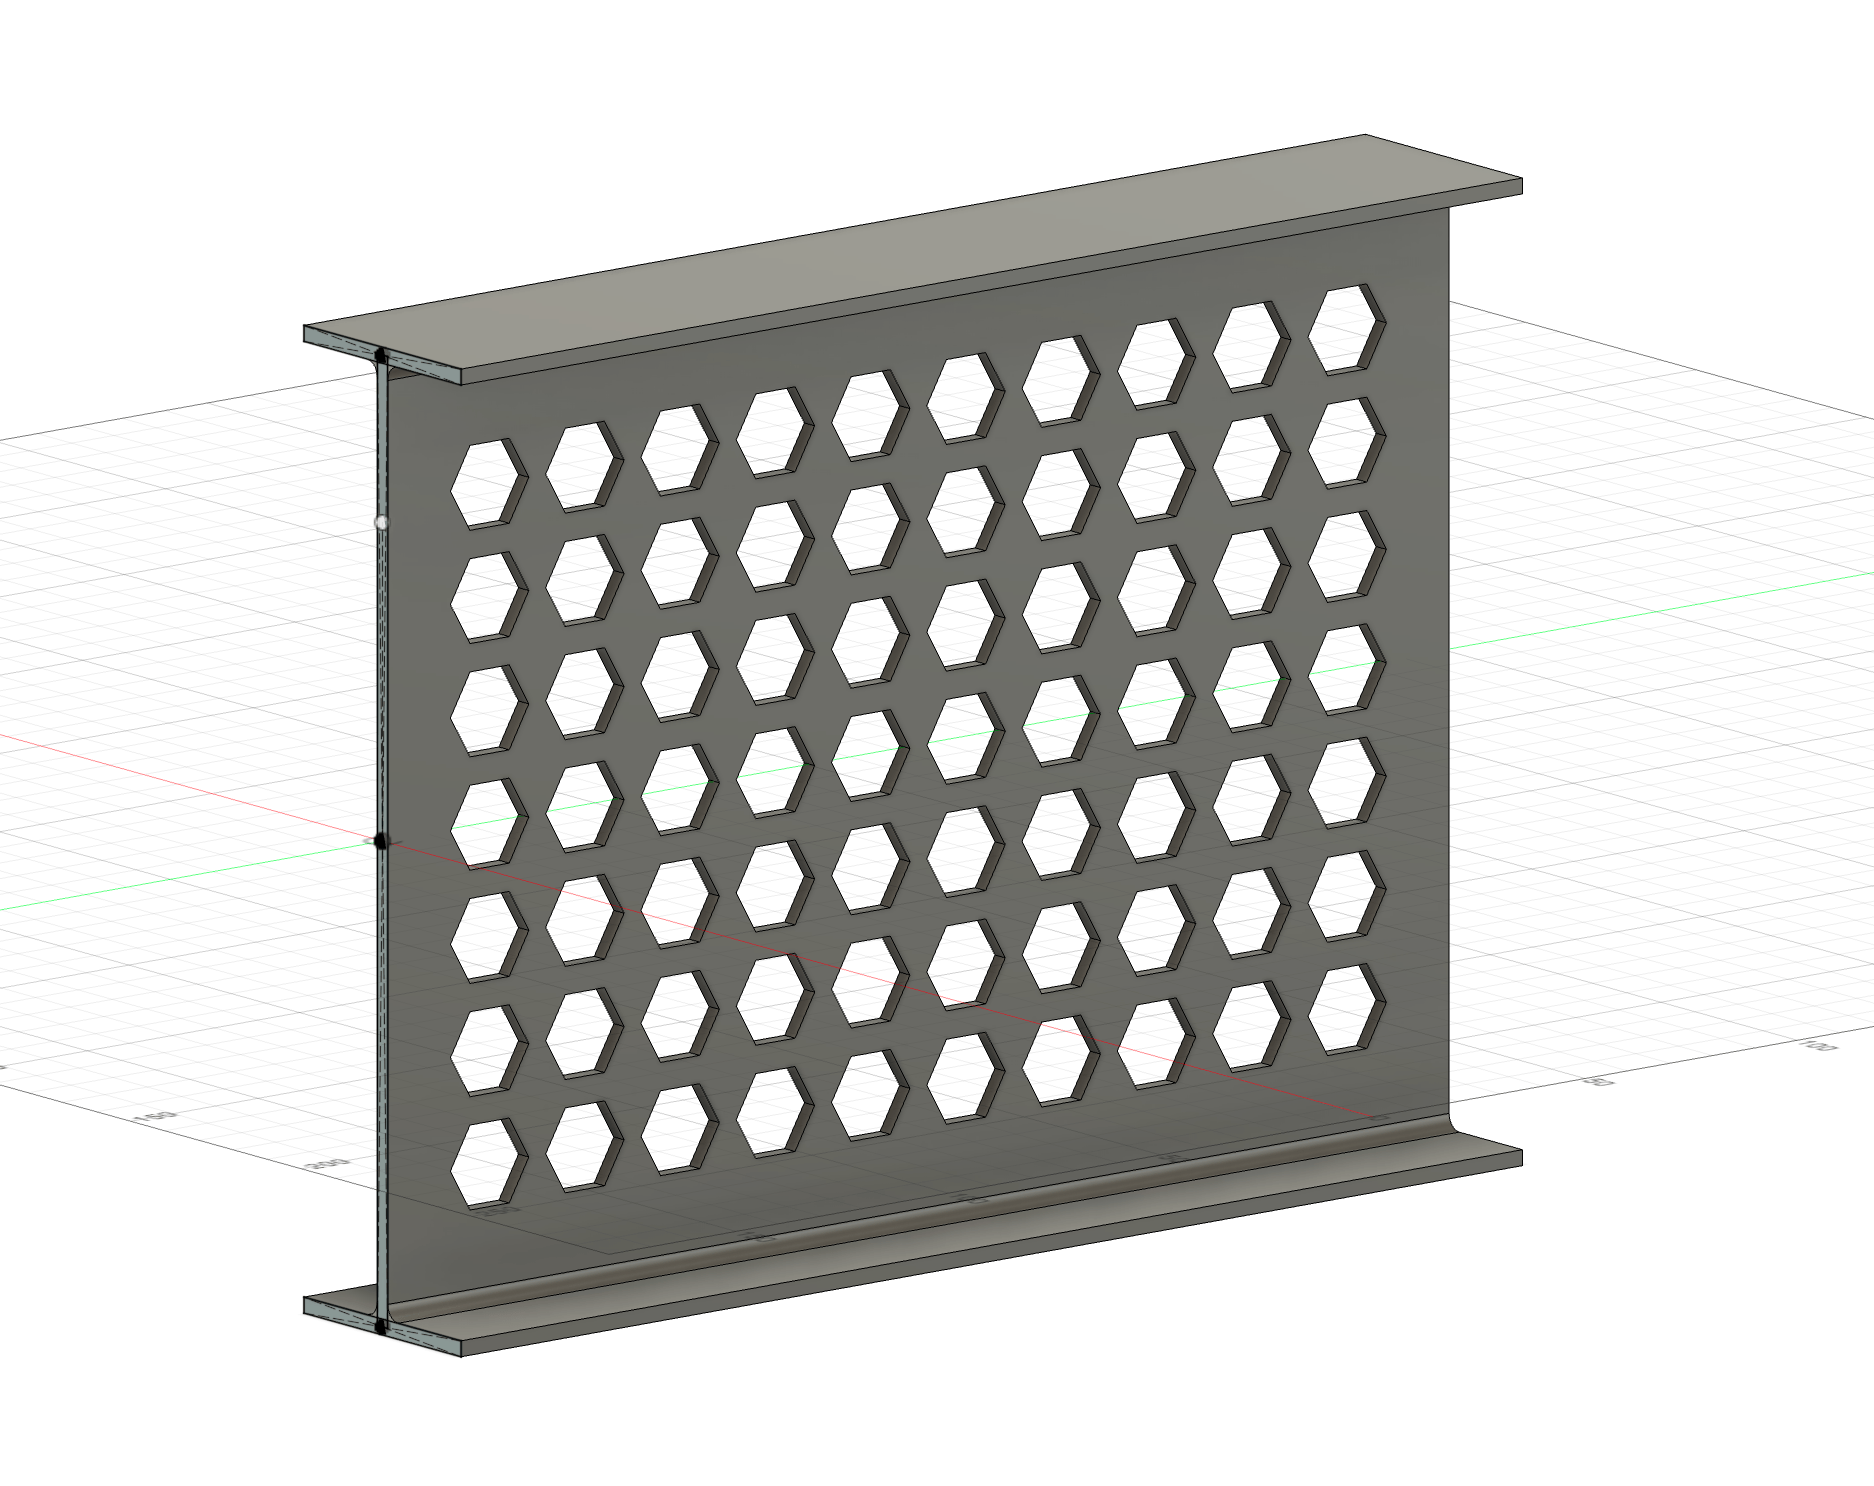
The finished model in Fusion.
After exporting from Fusion I brought the part into Bambu Studio to slice and print. I ended up printing the structure by laying it down on the bed so it looks like a capital letter I with serifs from the top view. This way it doesn’t need supports to print the upper part of the I (you can’t print into midair). It’s hard to think in 3D!
This was when I realized that the hexagons I picked had a steep angle that, in theory, has the same support problem. Instead of going back to the model and changing to, say, diamonds, I read that I might be able to get away with my 60°-off-vertical overhangs by printing at a smaller layer height, slower speed, and with more ventilation.
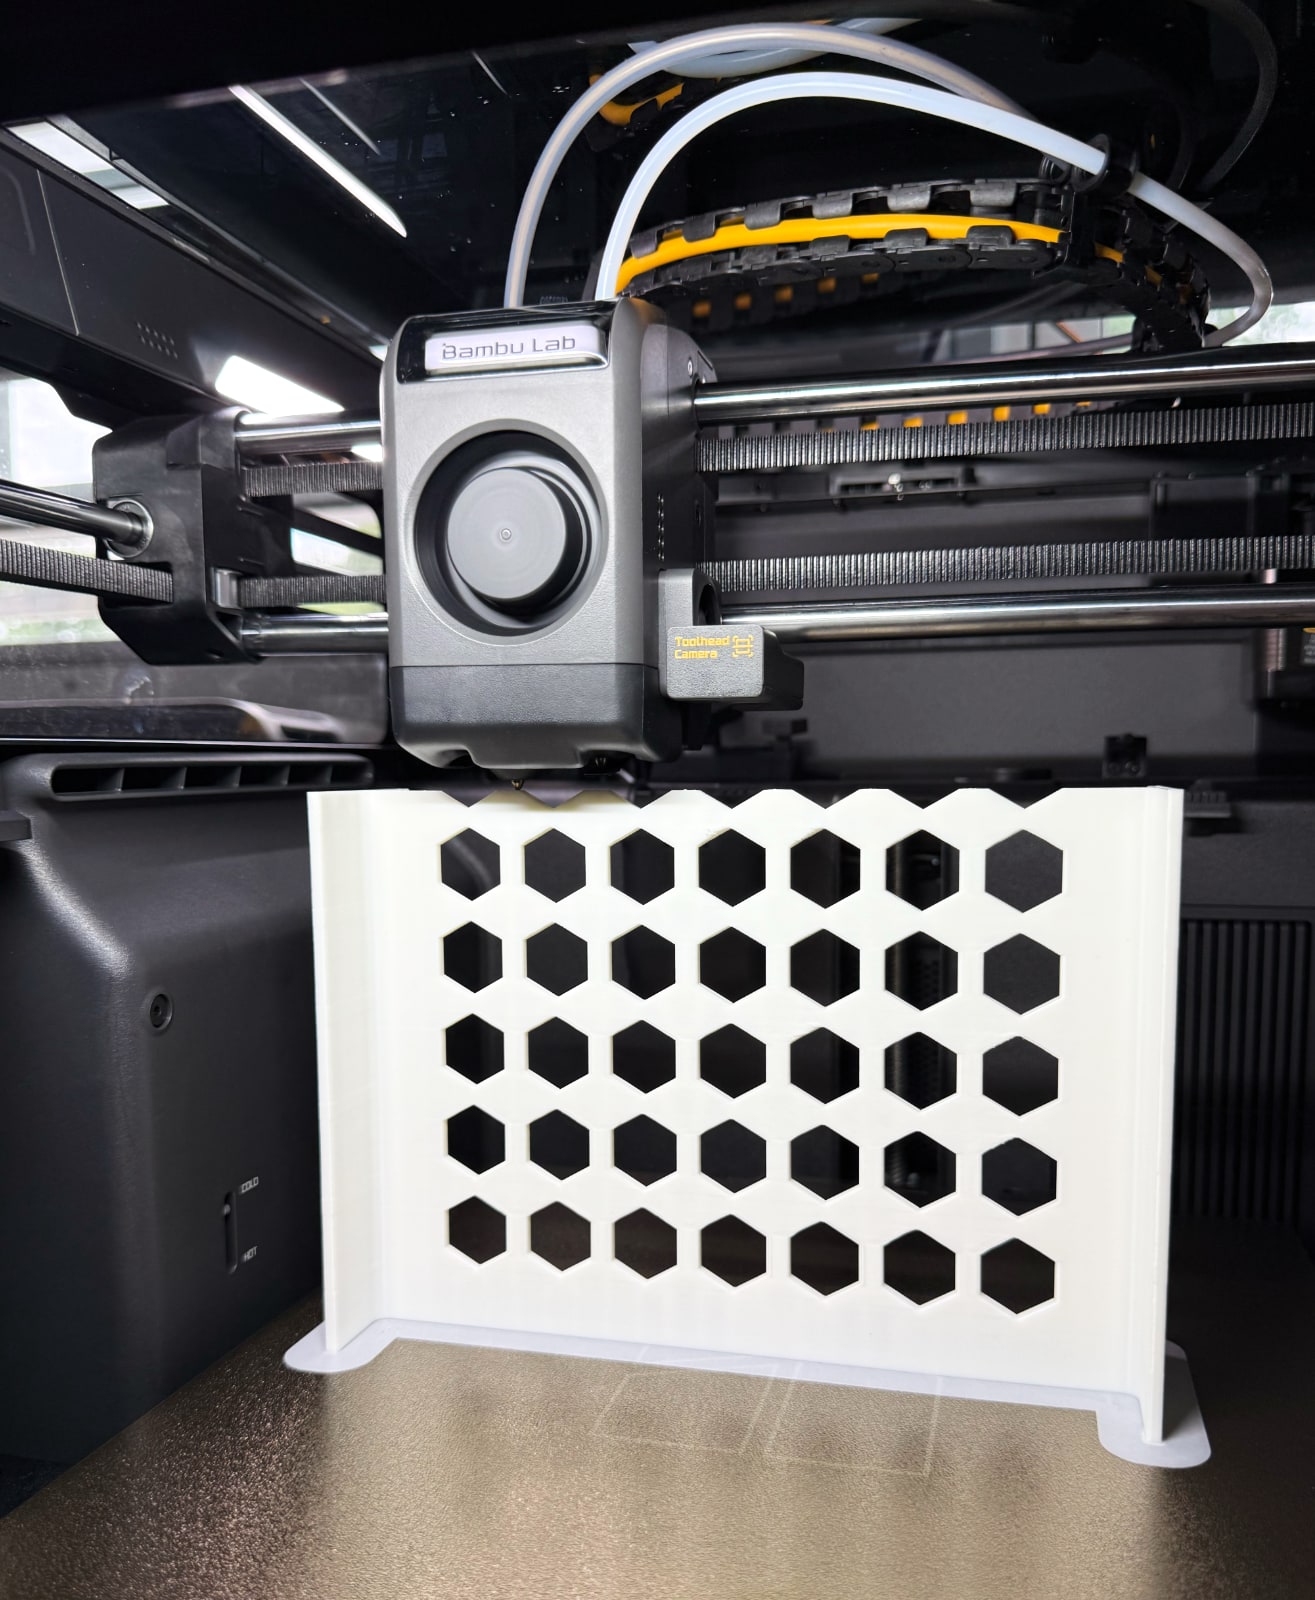
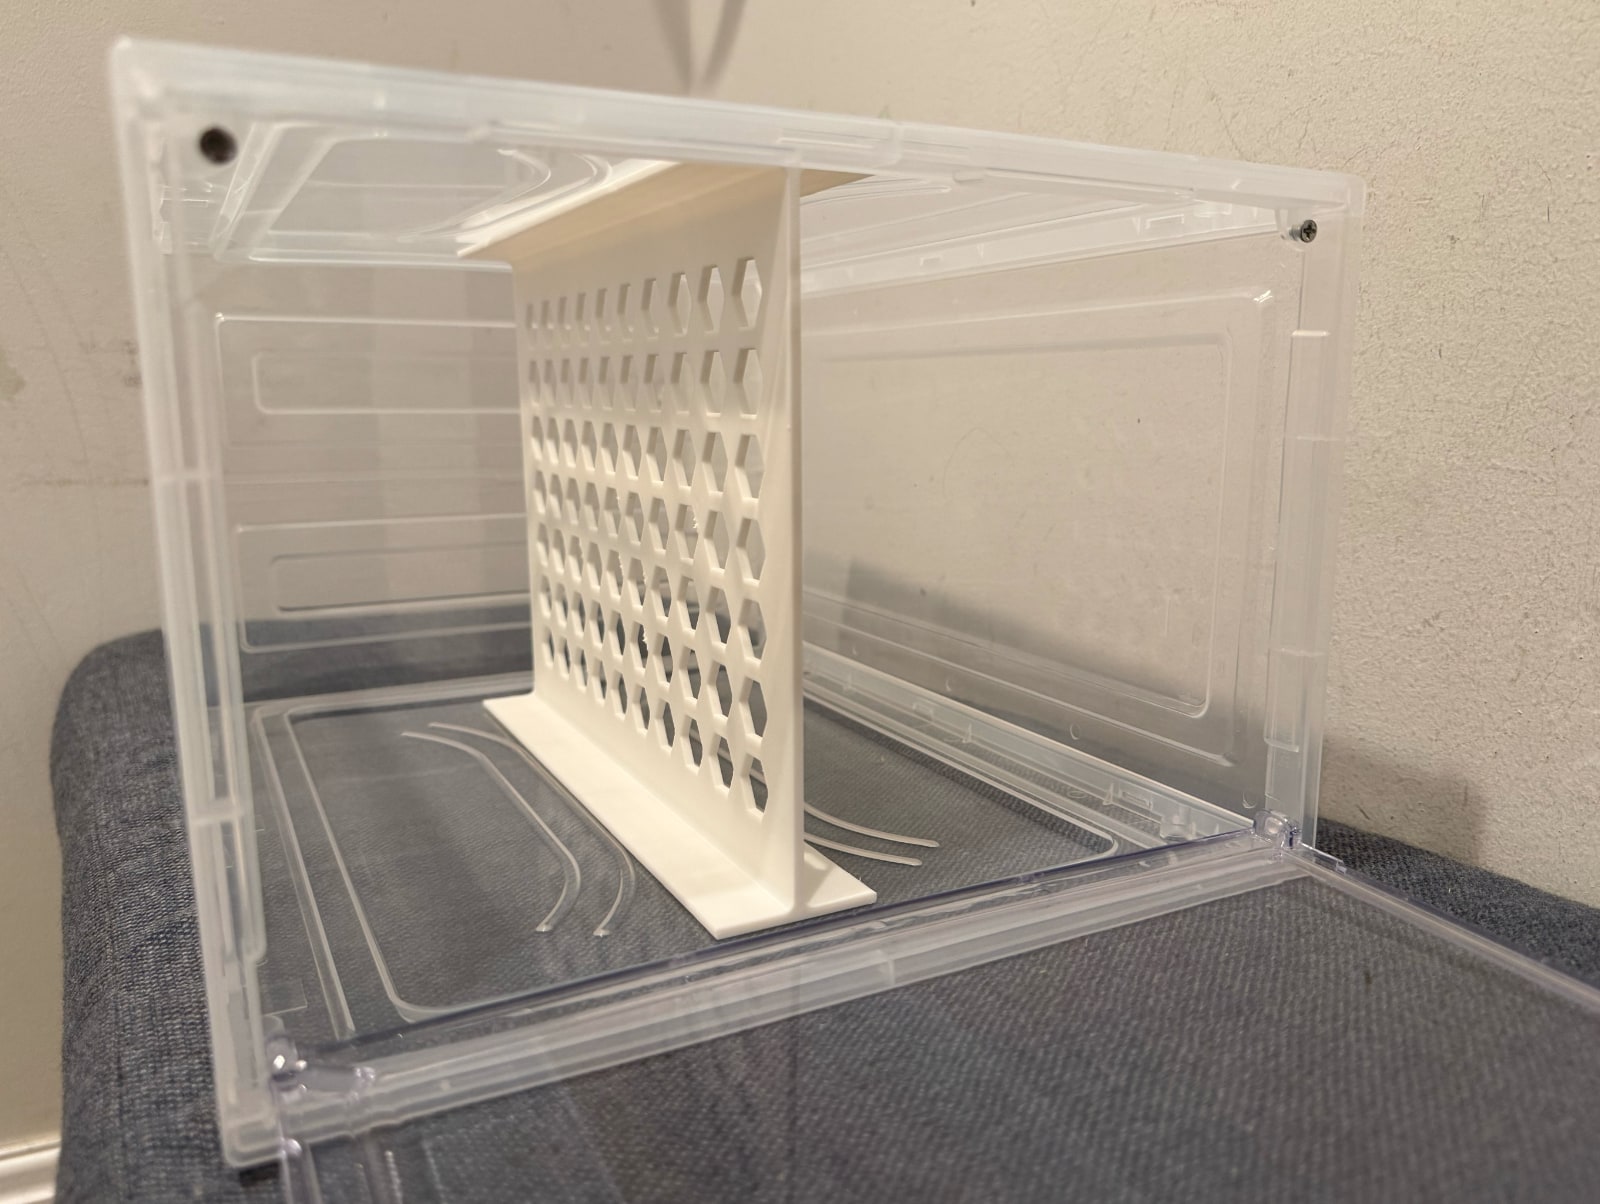
It took about 5 hours to print. The edges of the hexagon were a little messy, but it worked! I’m pretty happy with the way this thing looks given that I had no idea how to use Fusion at the beginning of the project.